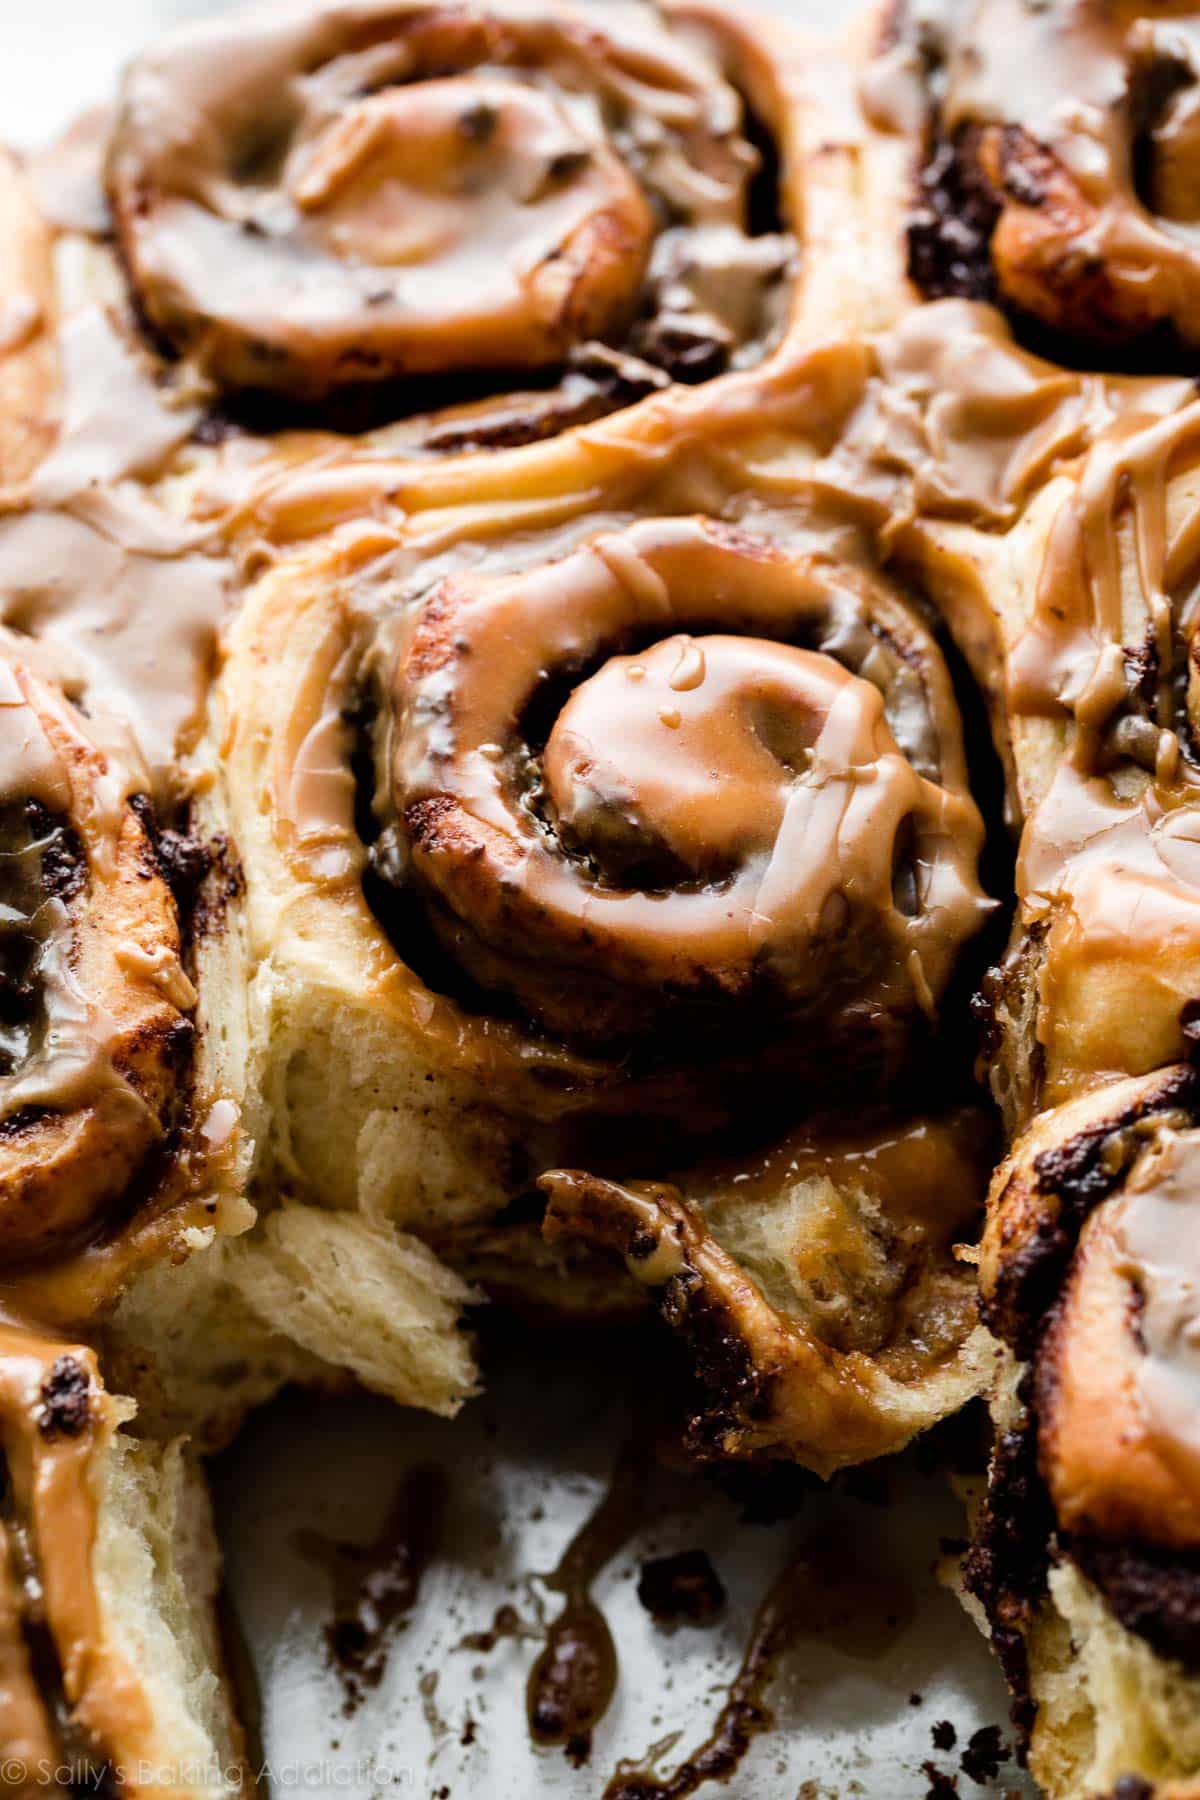
These rich and fluffy chocolate sweet rolls come together with a buttery soft fresh homemade dough and brown sugar chocolate filling. They're shaped like cinnamon rolls, but taste like flaky chocolate babka. You can make the chocolate rolls within a few hours or get started the night before using the overnight preparation option.
Recipe by Sally on May 1, 2021
Prep time: PT1H
Cook time: PT28M
Total time: PT4H30M
Rating
4.9 stars ( reviews)
Keywords
chocolate sweet rolls
Ingredients
1 cup (240ml) whole milk, warmed to about 100°F (38°C)
6 Tablespoons (75g) granulated sugar, divided
1 Tablespoon (9g) active dry or instant yeast
5 Tablespoons (71g) unsalted butter, melted and slightly cooled
2 large eggs, at room temperature
1 teaspoon salt
4 cups (530g) bread flour (spooned & leveled), plus more as needed for hands/work surface
6 Tablespoons (85g) unsalted butter, softened to room temperature
1/2 cup (100g) packed light or dark brown sugar
2 Tablespoons (10g) unsweetened natural or dutch process cocoa powder
1 teaspoon ground cinnamon
1 teaspoon pure vanilla extract
3/4 cup (135g) semi-sweet chocolate chips or a 4 ounce semi-sweet chocolate bar, finely chopped*
3 Tablespoons (45ml) heavy cream*
1 teaspoon espresso powder*
1 and 1/2 cups (180g) confectioners’ sugar, sifted (sift after measuring)
1/2 teaspoon pure vanilla extract
Categories
Breakfast
Cuisine
American
Steps
Whisk the warm milk, 2 Tablespoons sugar, and the yeast together in the bowl of your stand mixer fitted with a dough hook or paddle attachment. Cover and allow mixture to sit for about 5 minutes or until foamy on top. *If you do not own a mixer, you can do this in a large mixing bowl and in the next step, mix the dough together with a large wooden spoon/silicone spatula. It will take a bit of arm muscle. A hand mixer works, but the sticky dough repeatedly gets stuck in the beaters. Mixing by hand with a wooden spoon or silicone spatula is a better choice.*
Add the remaining sugar, the butter, eggs, salt, and 1 cup (about 130g) of flour and beat on medium speed for 1 minute. Scrape down the sides of the bowl with a rubber spatula. Add 3 cups (about 400g) flour, switch the mixer down to low speed, and beat until a soft dough forms and pulls away from the sides of the bowl. Dough will be very soft, but not overly sticky. Beat in 2-3 more Tablespoons of flour if dough seems very sticky. Avoid adding more flour than you need.
Keep the dough in the mixer (and switch to the dough hook if using the paddle) and beat for an additional 6-8 full minutes, or knead by hand on a lightly floured surface for 6-8 full minutes. (If you’re new to bread-baking, my How to Knead Dough video tutorial can help here.) If the dough becomes too sticky during the kneading process, sprinkle 1 teaspoon of flour at a time on the dough or on the work surface/in the bowl to make a soft, slightly tacky dough. Do not add more flour than you need because you do not want a dry dough. After kneading, the dough should still feel a little soft. Poke it with your finger—if it slowly bounces back, your dough is ready to rise. You can also do a “windowpane test” to see if your dough has been kneaded long enough: tear off a small (roughly golfball-size) piece of dough and gently stretch it out until it’s thin enough for light to pass through it. Hold it up to a window or light. Does light pass through the stretched dough without the dough tearing first? If so, your dough has been kneaded long enough and is ready to rise. If not, keep kneading until it passes the windowpane test.
Lightly grease a large bowl with oil or use nonstick spray. Place the dough in the bowl, turning it to coat all sides in the oil. Cover the bowl with aluminum foil, plastic wrap, or a clean kitchen towel. Allow the dough to rise in a relatively warm environment for 2 hours or until double in size. (I always let it rise on the counter and it takes about 2 hours. For a tiny reduction in rise time, see my answer to Where Should Dough Rise? in my Baking with Yeast Guide.)
Grease the bottom and sides of a metal or glass 9×13-inch baking dish or line with parchment paper.
Punch down the dough to release the air. Place dough on a lightly floured work surface and using a lightly floured rolling pin, roll dough into a 10×16-inch rectangle. Make sure the dough is smooth and evenly thick. If the dough keeps shrinking as you roll it out, stop what you’re doing, cover it lightly, and let it rest for 10 minutes to relax the gluten. When you return to the dough, it should stretch out much easier.
Mix all of the filling ingredients together except for the chopped chocolate/chocolate chips. The softer the butter is, the easier it is to mix. (Microwave it for a few seconds to soften if needed.) Spread mixture all over the dough. Sprinkle chopped chocolate/chocolate chips evenly on top. Tightly roll up the dough to form a 16-inch-long log. If some filling spills out, sprinkle it on top of the roll. With an extra sharp knife, cut into 12 even rolls, between 1-1.5 inches each. Arrange in the prepared baking pan.
Cover the rolls tightly and allow to rise until doubled in size, about 1 hour. (Or use the overnight option below.)
Preheat the oven to 350°F (177°C). Bake rolls for about 25-28 minutes or until they are lightly browned on top. After about 15 minutes, tent a piece of aluminum foil over the top of the pan to prevent the tops from browning too quickly and baking unevenly. Remove pan from the oven and place pan on a wire rack for about 10 minutes as you make the icing.
Warm the cream on the stove until barely simmering or warm it in the microwave for 15-30 seconds. Whisk espresso powder into the warm cream, then whisk in the confectioners’ sugar and vanilla extract until combined. Drizzle the icing over the warm rolls and serve immediately.
Cover leftover frosted or unfrosted rolls tightly and store at room temperature for up to 2 days or in the refrigerator for up to 5 days.
Reviews
Dave Conant on 2024-11-03 (5 stars): I just made these, and can't wait to try them. The dough goes together quickly and is by far the easiest enriched dough I have ever worked with. I ended up with 4 tablespoons of cream and a cup of powdered sugar to get a drizzleable(?) icing but other than that, everything looks awesome. Wish I could post a picture. I used 100% whole wheat artisan bread flour and will do that for all my enriched breads moving forward. Thanks.
Shannon on 2024-11-10 (5 stars): This might be the best thing I have ever baked! Omg I want to eat the entire pan right now
Annie on 2024-12-23 (5 stars): This is my go-to cinnamon roll recipe!
We make it at least once a year during the holidays.
I especially love the espresso icing, it really adds that special kick to the entire dessert!
Kendall on 2025-01-25 (5 stars): I’m awful at yeasted baking. But I’m trying to learn! Decided to test this recipe with a “just” expired package of instant yeast and after reading all your tips and watching your tutorials. I had to refrigerate during the first rise as I ran out of time. But warmed the dough in the oven after that, like your rising tips suggest. Then refrigerated overnight. Had to leave in a warm oven in the morning to get them to really rise, but we just ate them and they are fluffy and decadent! No espresso sauce cause my kiddos are little but a drizzle of salted caramel to balance the sweetness. So excited I made something I didn’t have to toss!!
Hannah A on 2025-03-03 (5 stars): These rolls. Oh boy.
I had problems when making them, because my yeast wouldn't rise, and I realised I only have instant coffee, and no heavy cream. The dough was so sticky I was concerned I should add more flour. I added a tbsp of flour to the filling because I used a soft margarine that I was certain would come right out of the rolls\
Oh my goodness gosh these rolls. So good. So sweet, so rich, so overwhelmingly delicious. I don't like cinnamon rolls with much frosting, so I drizzled the frosting carefully. But it just Works.
Even with my multiple subs along the way, this recipe pulled together (like a lot of SBA recipes) and became a new favourite of mine.
Subs made: water and skim milk powder, AP for bread flour, becel margarine for the filling. (mostly for cost) added flour to the filling. Lowered cinnamon to a dash.
Frosting was made on the fly, since I was missing 2/3 key ingredients. Instant coffee, maybe a tbsp, 1-2 tbsps warm water, sugar as needed.
Amber on 2025-03-16 (5 stars): I baked these yesterday and ate far more than I really care to admit! Absolutely wonderful recipe. The dough was so soft and lovely to put together. Perfectly chocolatey and very very nice to eat the next day! Huge hit at home. Thanks for the amazing bake!
AA on 2025-05-03 (5 stars): I made these and absolutely loved them. However, my family found it quite big.
Is there any way I can get smaller rolls without making it flatter?
Emma on 2026-01-22 (5 stars): Great recipe! Used coconut sugar instead of regular sugar since my husband is allergic to cane sugar. Turned out great. Used an unsweetened chocolate baking bar and added a tad bit of honey to the inside of the rolls to keep them from turning out too bitter. Skipped icing and just ate them plain. Tasted amazing! My husband loves them!
Colleen E on 2026-01-30 (5 stars): I haven’t made these yet but I’m so excited to! Is it possible to fill it with Nutella instead of the chocolate filling?
Ashley on 2026-03-18 (5 stars): These were fantastic! Perfect with a cup of coffee for breakfast! Loved them.