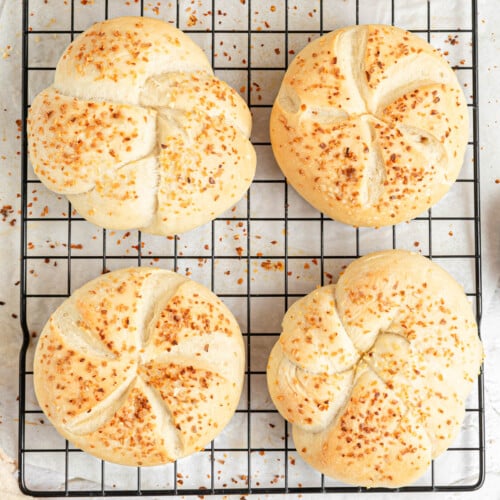
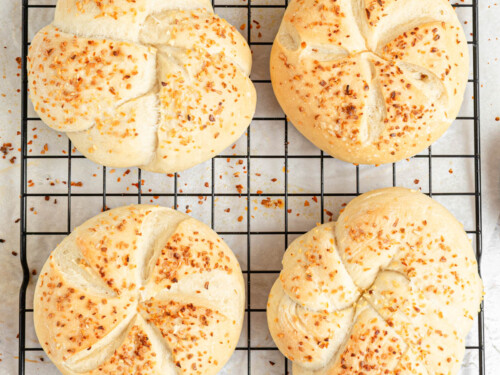
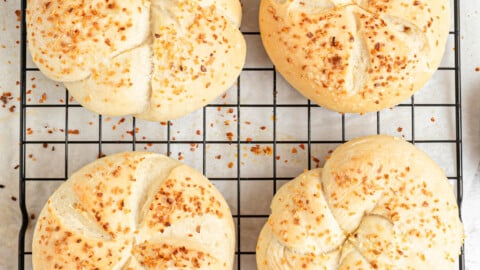
Behold — a same-day recipe for homemade Kaiser rolls that has been obsessively tested and perfected by me! Friends, the result is soft, fresh, and lightly browned Kaiser buns perfect for sandwiches and burgers. My recipe is great for beginner and seasoned bread bakers with different roll shaping methods shared, including knotted, scored or stamped.
Prep time: PT20M
Cook time: PT20M
Total time: PT160M
Rating
5 stars (13 reviews)
Keywords
mixer, sandwiches, yeast
Ingredients
600 grams all-purpose flour ((plus more for dusting))
15 grams diamond crystal kosher salt
10 grams sugar
6 grams instant yeast
360 grams water ((90°F))
30 grams olive oil
1-2 teaspoons milk
1-2 teaspoons dried minced onion ((poppy seeds, sesame seeds, or everything bagel seasoning will also work))
Categories
Bread
Cuisine
Austrian
Steps
Mix. In the bowl of your stand mixer, whisk together flour, salt, sugar, and yeast. Make a well in the center and pour in the warm water and olive oil. Mix on low speed with the dough hook until the dough comes together in one shaggy, messy mass on the dough hook. This can take a few minutes, be patient. Pause and scrape down the sides of the bowl if you need to.
Knead. On low speed, knead for 5 minutes until the dough smooths out but is still a little sticky to the touch. Scrape down the dough hook, flip the dough over in the bowl, and knead 3-5 minutes more. The dough will still be a little sticky but should look smoother.
First Rise. Tuck the dough into a ball and place it in a lightly greased bowl (you can use your mixer bowl). If the dough sticks to your hands too much, you can lightly grease them to make it easier to handle. Cover and let rise at room temperature until doubled in size, about 1-1½ hours.If your kitchen is cold, place it somewhere nice and warm to rise, otherwise it may need an extra 30 mins or so.
Divide. Gently deflate the dough and turn it out onto a clean, lightly floured work surface. Divide into 6 equal pieces.
Shape a knot. Roll a 20" rope of dough (no fancy pre-shaping required). Do not taper the ends. Dust your hands lightly with flour and give the rope a quick roll — the flour will keep it from sticking to itself while you shape it. Create a loop in the middle of the rope, crossing the two ends over each other. Thread one end of the rope through the middle of the loop, leaving some space in the loop. Take the end of the rope that is poking through the middle and wrap it around the loop again so it pokes back through the middle. Then, take the other end of the rope and wrap it around the front of the loop, pushing it through the middle to pinch it together with the other end of the rope so the joined ends are tucked inside. (See video below if this is confusing!)If shaping rolls to score or stamp, knead or shape each piece of dough into a tight ball with the seam tucked underneath. Score or stamp the rolls immediately before baking, after brushing with milk and sprinkling with minced onion.
Second Rise. Spray the tops of the rolls lightly with non-stick spray. Cover with plastic wrap, and place a sheet pan on top to weigh them down as they rise until doubled in size and quite puffy, 1-1½ hours. The weight of the sheet pan will force them to rise outward rather than upward.
Preheat to 400°F. Toward the end of the rise time, preheat the oven to 400°F.
Toppings. Immediately before baking, brush the Kaiser rolls all over with milk, then sprinkle with dried minced onion. If doing round rolls, use a sharp knife or lame to score 5-6 lines arcing out from the center of each roll, about 1/2" deep. If stamping your Kaiser buns, do so now.
Bake. Bake the Kaiser rolls for 18-20 minutes until pale golden brown on top. Remove from the oven and let cool on the sheet pan 5 minutes before transferring to a wire rack to cool completely.
Reviews
Connie A on 2025-08-28 (5 stars): Hello, i finally made these rolls. Super easy; you have written down 168g of dough per roll at six rolls. I thought this was excessive and a heavy bun but obviously everyone likes a different size:) I made nine rolls at 110g each. They turned out really well, although i am wondering now if i should try 8 rolls with more grams per each since they seemed smaller in size? Maybe try 120g per cut? And when I was rolling into logs at 20”, they were a tad thinner because i reduced the grams per dough. Im going to try again LOL I am also going to ask if this dough needs a window pane test prior to first rise? The dough was sticky and smooth but after 10 minutes of kneading it didnt pass that test and i stopped anyway. Thanks!
Jill on 2025-05-05 (5 stars): These are so easy to make & taste amazing! I had a small amount of leftover fried halibut which I turned into fish sandwiches the next day with these rolls!
I've made lots of Rebecca's recipes & she's become my go to when wanting to try something new. Yes the recipes are measured in weight; buy a scale & move on! 🤣
William A on 2025-03-31 (5 stars): Great recipe and Instructions. Will make this over and over again. Will make my NY style HARD EGG sandwich that I haven't had for over 20 years.
Karen S on 2025-03-24 (5 stars): I made this recipe today — delicious! I agree with the other bakers that they are HUGE. I’ll try halving as another baker did since it’s just me and my hubbie in the house. I even wondered about formulating this as a ”small batch” recipe. The knot tying video was a great help, and I liked the way they looked. One issue — in the printed instructions, it does not say to divide into six pieces at the end of Step 3 or beginning of Step 4. I used white sesame seeds. Next time I may try an egg wash to make them stick tighter.
Keep up the great work, Rebecca, your bread recipes are phenomenal!!
Vicki Potter on 2025-03-14 (5 stars): These rolls are fantastic. The recipe was easy to follow. I will definitely be making these again!
Katrina on 2025-03-03 (5 stars): I made these today and they were a hit with everyone. I topped a few with dried onion and the rest with sesame seeds.
Very easy to follow directions and I cannot wait to make them again for sandwiches.
Jenbowd on 2025-02-26 (5 stars): After success with several other recipes from Rebecca, I gave these Kaiser rolls a try. What fun! The dough was stickier than I expected after the first rise, but I survived thanks to my bowl scraper. My husband is not a fan of onions (or anything spicy, sadly) so I topped my rolls with plain sesame seeds. It was a good choice as it added "a little something".
The only really tricky part was making the knots. I watched the video several times, and then dove in. Were my knots perfect on the first try? No! But did those rolls still taste delicious? You bet!
Thanks to Rebecca for another winning recipe!
#teamkitchenscale
Isabelle on 2025-02-24 (5 stars): These were great!! Totally doable even without a stand mixer, and I took the easy route of making balls and scoring them for my first try. Next time I'll do the fun knots!
MAS on 2025-02-20 (5 stars): I made this! Pleasing results. Don't be daunted by the rolling and creative twisting. It makes sense once you start doing it. And, fortunately, rising dough is very forgiving. I bake bread 2 or 3 times a week and I prefer rolls versus loaves. This kaiser roll shaping option is a welcome change to my routine. Using a baking sheet during the second rise is something I have been experimenting with without success. No-stick cooking spray and plastic wrap were the elements I was missing. This secret makes me happy and I have used it with my other bakes.