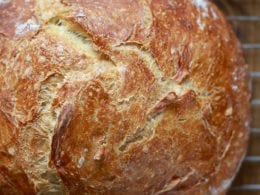
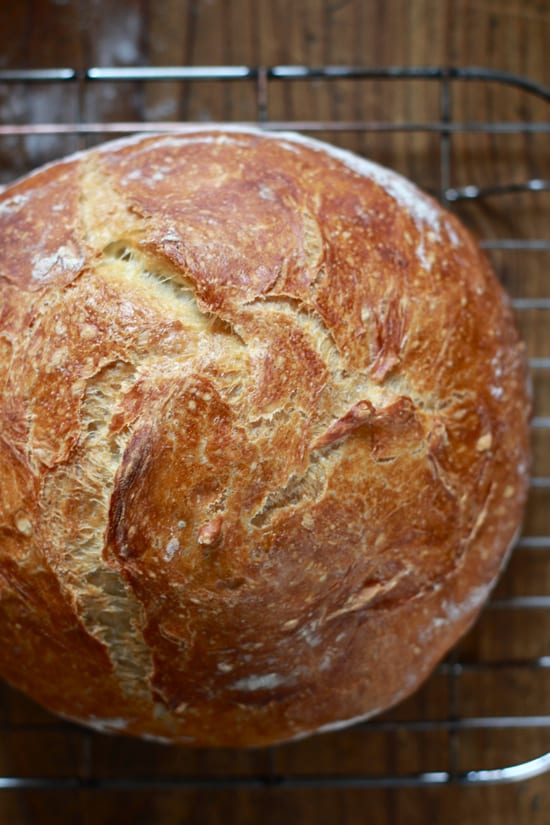
An incredible recipe for no-knead artisan bread baked in a Dutch oven. I like to make the dough in the evening (after dinner) to rise overnight. It's fantastic for sandwiches, crostini, and to mop up delicious sauces! Recipe adapted from Jim Lahey's No-Knead Artisan Bread.
390g (3 cups) bread flour (not all-purpose) + more for dusting
¼ teaspoon instant yeast
1¼ teaspoons fine sea salt
320g (about 1 1/3 cups) water
Categories
Yeast Bread
Cuisine
American
Steps
In a large bowl add the flour, yeast, salt and water. Stir until a rough dough forms. If it seems very dry, add more water.
Transfer to an oiled container and cover loosely with plastic wrap. Let rise for 14 hours- overnight, at room temperature (about 70 degrees). Your dough is ready when it has puffed up in volume, about 1 1/2 -2x its original size. *See note below.
Lightly flour a sheet of parchment paper and place the dough on top. Fold dough in half and then fold it in half again.
Shape the dough into a ball by tucking the sides underneath itself, and place onto the paper, seam side down. Cover and rest again until puffy but not fully risen, about 30 minutes- 2 hours depending on how warm your kitchen is.
Preheat your oven to 500 F. Put a (6 quart) dutch oven pot inside for 20 minutes. When ready to bake, remove pot from the oven. Place your hand underneath the parchment paper and invert the dough into the pot. The seam will be facing up. Cover the pot with the lid.
Place your bread into the oven, and reduce the temperature from 500 to 400 F. Bake for 40 minutes, covered. Remove the lid and bake for an additional 15 to 20 minutes, until golden brown.
To make sure that the bread is completely cooked through, take its temperature. Carefully tip the bread onto its side and insert a thermometer into the bottom. It should read 200-205 F. If not, place it back into the oven until it is ready (extra time in bread baking is a good thing). If you’re worried about the top getting too brown, put the lid back on.
When your bread is ready, transfer to a wire rack to cool. It should feel light and make a hollow sound when you give it a knock underneath. Let it cool for at least 1 hour. Cutting it too soon might ruin the texture resulting in a gummy crumb!
Reviews
Pablo on 2020-07-02 (4 stars): Hi, I use a ceramic pot with a lid. It doesn't really closes tight, so I put some foil paper between the lid and the pot to seal it. I've heard that you can use pyrex or even a flipped stainless steel bowl as a cover over a baking stone or tray. Good luck!
Tony from Brooklyn on 2020-07-25 (5 stars): Once I'm done with the 2nd proofing the dough, can I store the dough in the refrigerator until I need to use it? I don't mind waiting for the dough rise overnight but I don't want to have to always plan a day ahead.
I'd like to reach into my fridge (or freezer?) and have it ready to bake.
How long could I store it for?
Steve Knight on 2020-09-06 (5 stars): I am 81 years snd have not baked bread for many years. I am now making my 6th loaf today. it's fantastic. All my friends want more so I'm on lock down having the pleasure of making this bread for them. it gives me a great sense of pleasure to give them every extra loaf. its so easy if you just follow the instructions. thank you snd Mr. Lahey!!! 5 stats!!!
Allison M. on 2021-02-28 (4 stars): Flavor wise it’s great but my bread seems dense. Having trouble getting a nice rise on my loaf. Do I need to make more of an effort to get it into a smaller ball during the prodding stage?
Jane on 2021-04-08 (5 stars): Thanks for this recipe. Made and added black olives. Question though......Do you put the lid on when heating up the pot?
Melanie on 2021-05-07 (5 stars): I have never made bread before. I can’t knead dough very much as I have always had weak wrists. I bought a clay baker and made this bread recipe. And now I have been making it for almost a year. The bread is light, super tasty and no extra ingredients. Flour, salt, water and a wee bit of yeast. My family and anyone who gets a slice absolutely loves it. I am still super amazed that I am making bread. Thanks so much for posting this recipe.
Maday Bosca on 2021-07-02 (5 stars): This recipe is so easy and delicious. Wishing I could post pictures of the breads I’ve been making lately. Thank you.
Naomi Rechter on 2021-07-22 (5 stars): Love this recipe - tried others with similar ingredients but this method produces the best results. I know you said below you can double it to make two loafs at once. Can you cook the doubled ingredients as one whole loaf to make larger slices (mine are pretty small!)
Thanks!
Traci on 2021-08-22 (5 stars): Really enjoyed making this. First time making bread that we wanted to eat. Thanks for this fun recipe.
Ulrike on 2024-01-21 (5 stars): Not sure if you have Aldi in your area but I bought several there including a bread crockpot with a domed lid all under 30 dollars . Costco has sales also . Just make sure it’s a metal knob I had plastic blow in my oven at 450 .
Ulrike on 2024-01-21 (5 stars): Correction not crockpot - bread baker
Lidia on 2024-02-15 (5 stars): Hi Austin,
As per my experience and my mom's or grandmother's experience, the water should feel good at your hand wrist, more to warm not cold. We 've never used a thermometer to measure the temperature of the water and trust me, my mother used to bake all her life, every week 7 big loafs of bread.
Lidia
Marylou Kormann on 2023-12-17 (5 stars): 12 - 18 hours works for me...don't really see much difference in the loaf.
Lidia on 2024-02-15 (5 stars): Hi Rachel,
I think Emilie specified that she began the process of this bread after she takes dinner and let the bread overnight to proof. That probably means that she let the dough proof for 14 hours (overnight) and the next morning she began to "attack" it and continue with it until she bakes it. So, if she takes dinner at 7 pm and let's say, she begins the dough at 8 pm, then the next morning at 10 am she will continue to work this dough until she bakes it. I hope this makes sense. At least, this is my understanding.
Lidia
Don Donadio on 2023-02-24 (4 stars): Why is this recipe different from the same recipe in his book?
Keith on 2023-04-22 (5 stars): I have made this bread several times now, it has been excellent every time. If I want it to last long enough to make it to the dinner table, I have to make a second loaf. I sometimes put corn meal on the bottom of dutch oven or some rosemary on the top for a twist but your recipe is perfect from the get go!
Lindsay on 2023-08-31 (4 stars): Made it twice now and both times the bread rose well but was spread out after shaping/wouldn’t go into a ball. The taste is great but it’s sad that the loaf is flatter and wider than tall/puffy.
Spring on 2024-01-05 (4 stars): Hi: been making this bread for years, but I never leave it overnight. I mix it in the morning, leave it to raise for 4/5 hours (this is how the original reads) in my closed microwave and heat and cook same day. Works every time! Also, per JL’s mention, I add 1/4-1/2 tsp of red wine vinegar to the water when I heat it.
Lidia on 2024-02-18 (5 stars): Sorry! "...let the dough overnight to proof", not "the bread".
Lidia
Geetanjali on 2024-04-08 (5 stars): Made this bread for the first time and it came out perfect! Kept the dough overnight in an unheated oven with the light on as it’s still cold in New Jersey! I also did not turn over the dough but just put the parchment paper with the dough in the heated Dutch oven.
Gail on 2024-10-22 (5 stars): This bread is amazing. I will make it over and over again
Rebecca Andrew on 2025-02-09 (5 stars): Perfect and perfectly easy!
Dona Sickels on 2025-02-11 (3 stars): I’ll preface my comment by saying that I’ve been making yeast bread for over thirty years. That said, is the finished loaf supposed to be about 2” tall? I’m guessing that given the small amount of yeast used that it is. Do you have another recipe where the bread is bigger? I think I’ll try it again as the bread is delicious, but with more yeast.
Shannon on 2025-03-06 (5 stars): I threw a batch of ‘rustic’ dough in the frig for the next day after starting too many tasks. The next day I baked it, thought it was burnt, but thankfully didn’t throw it away because after it cooked and was sliced it is delicious. Then ‘My Bread’ delivered from Amazon and I learned that method of bread baking is an official ‘technique.’ Sign me up! It’s easy and tastes great. I have more dough on the frig right now… trying wheat and rye.
Cheryl Litherland on 2025-05-06 (4 stars): I bought the 32 oz containers you have a link to, made my dough and put it in the container and lightly covered with the oiled plastic wrap to rise. In the morning the dough had risen so much overnight that about 1/2 of the dough had dripped over the edge and onto the countertop. I couldn't figure out how a container like that could hold rising dough, and guess my thoughts were correct. Should I next try to rise my dough in a glass bowl?
Laura on 2025-05-16 (5 stars): Hello, love this but I can’t get the “invert into a pan” technique down. It kind of flops off the parchment paper and becomes misshapen. Can you do a video of the technique, point me in the direction of one, or explain in more detail how to do this? I just can’t figure it out.
John Parkes on 2025-06-01 (5 stars): Family approves. Perfectly crusty and tasty.
Kecia on 2026-01-04 (5 stars): The easiest and tastiest artisan bread I’ve ever made. My kids loved it too. Super moist in the inside and held its structure well while remaining moist for days after.
Great recipe that has given me the confidence to try more difficult bread recipes !!
Jane on 2026-01-14 (5 stars): Is this recipe suitable for wholemeal bread flour?
Thanks